
Why You’ll Love This this Crispy Homestyle Chicken Kiev
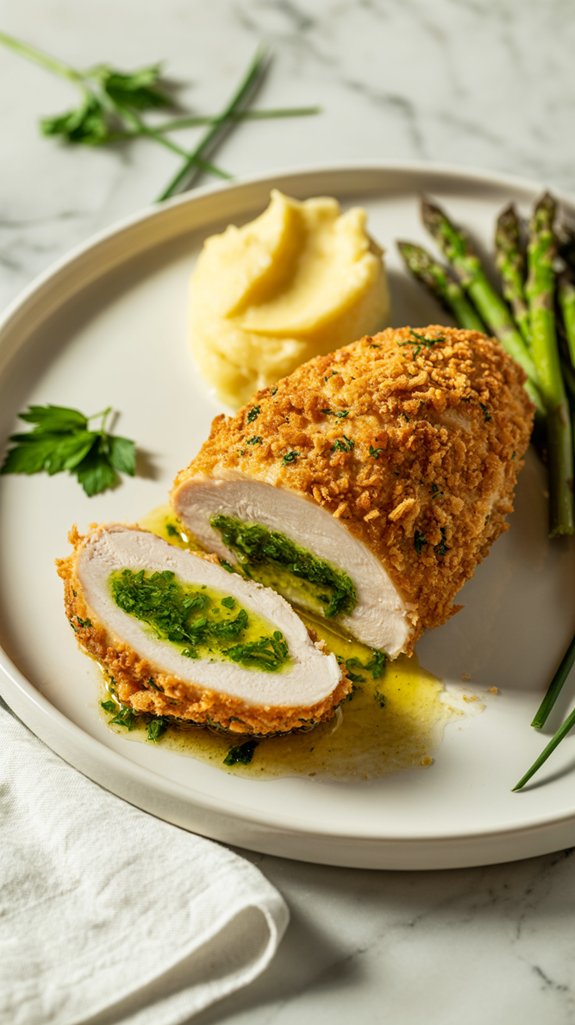
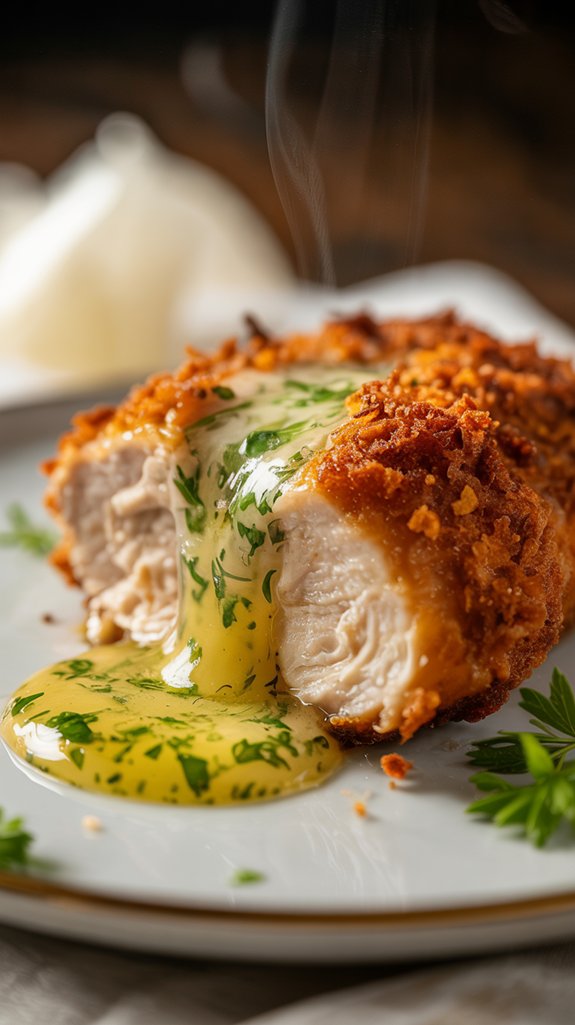
This chicken kiev delivers that perfect moment when you cut into golden, crispy coating and watch herbed butter come flowing out like a little culinary miracle.
You get tender, juicy chicken wrapped around a garlicky butter center that’s basically like finding treasure inside your dinner.
The whole thing fries up beautifully crispy on the outside while staying incredibly moist inside, which honestly feels like cheating at cooking but in the best possible way.
Ingredients List
You’ll need just a handful of simple ingredients to create this restaurant-quality dish that’ll have everyone thinking you went to culinary school.
- 4 tablespoons butter
- 1/2 teaspoon garlic powder
- 1 teaspoon parsley, minced
- 2 boneless skinless chicken breast halves
- 1 egg
- 1/4 cup flour
- 1/4 cup breadcrumbs, finely crushed
- 2 1/2 cups vegetable oil
Ingredient Considerations:
- This recipe is pretty indulgent with the butter and deep frying, so it’s definitely more of a special occasion dish than everyday health food
- You could swap the vegetable oil for a healthier option like avocado oil if you want to feel slightly better about the deep frying situation
- The butter is really the star here, so don’t try to substitute with margarine or you’ll miss out on that rich, authentic flavor that makes chicken kiev worth the effort
Step by Step Directions
This classic chicken kiev delivers crispy golden perfection with a molten herb butter center that creates an impressive dinner centerpiece.
- Make the herb butter: Combine 4 tablespoons butter, 1/2 teaspoon garlic powder, and 1 teaspoon minced parsley, then form into 2 log-shaped rolls.
- Prepare the chicken: Pound 2 boneless skinless chicken breast halves flat and insert one butter log into the natural pocket on the underside of each chicken half.
- Secure and seal: Roll up each chicken breast tightly, using toothpicks to hold closed and prevent the butter from leaking during cooking.
- Set up breading station: Beat 1 egg in a shallow dish, place 1/4 cup flour in another dish, and 1/4 cup finely crushed breadcrumbs in a third dish.
- Bread the chicken: Dip each rolled chicken breast first in flour, then in beaten egg, and finally coat thoroughly in breadcrumbs.
- Chill thoroughly: Refrigerate the breaded chicken for at least 1 hour to help the coating adhere and prevent the butter from melting too quickly.
- Heat oil and fry: Heat 2 1/2 cups vegetable oil in a deep fryer or heavy pot to 350°F, then deep fry the chicken for 15 minutes or until golden brown and cooked through.
- Drain and serve: Remove from oil and drain in fryer basket or on paper towels before serving immediately while the butter center is still molten.
For restaurants and commercial kitchens preparing multiple servings, a professional deep fryer ensures consistent temperature control and faster cooking times.
Substitutions and Variations
• Mini chicken kievs: Cut chicken into smaller portions and make bite-sized versions – perfect for parties.
Though you’ll need to adjust the cooking time down to about 8-10 minutes.
- Seasoning variations: A pinch of paprika, onion powder, or even a tiny bit of cayenne in that herb butter can completely change the flavor profile without messing with the basic technique.
- Coating alternatives: Crushed cornflakes, seasoned crackers, or even finely ground nuts create different textures and flavors while keeping that essential crunch.
Additional Things to Serve With This Dish
This crispy, butter-filled masterpiece deserves sides that won’t compete for attention but will definitely make your plate look like it came from a fancy restaurant.
- Garlic mashed potatoes – Because when butter is already the star of your chicken, why not double down with creamy, garlicky spuds that’ll soak up any escaped herb butter like a delicious sponge.
- Simple green beans or asparagus – Something bright and snappy to cut through all that richness, plus the color contrast makes everything look more elegant than your usual Tuesday night dinner.
- Light salad with lemon vinaigrette – Think mixed greens, maybe some cherry tomatoes, nothing too fancy since you’ve already done the heavy lifting with the chicken.
- Roasted vegetables – Carrots, Brussels sprouts, or broccoli work beautifully, especially if you toss them with a little olive oil and let them get slightly caramelized in the oven.
- Rice pilaf or wild rice – Something nutty and textured that’ll catch any of that precious butter when it inevitably starts oozing out, because to be frank, it’s going to happen no matter how perfectly you seal those toothpicks.
- Crusty bread rolls – Not exactly necessary but hey, if there’s herb butter involved, someone’s going to want something to mop it up with.
Cooking Tips & Tricks (Chef’s Notes)
Getting this dish right is honestly all about timing and keeping that butter from staging a great escape while you’re cooking.
- Chill everything, and I mean everything – Your formed chicken rolls need at least that hour in the fridge, but honestly, two hours is even better because cold butter stays put much longer than room temperature butter that’s ready to bolt at the first sign of heat.
- Double-check those toothpicks – I know it seems obvious, but you’d be surprised how many people think one measly toothpick per roll is enough when you really need two or three, strategically placed like little wooden soldiers guarding your butter fortress.
- Don’t skip the flour step – That initial flour coating isn’t just busy work, it’s what helps the egg stick, which helps the breadcrumbs stick, which creates the barrier between your precious herb butter and the hot oil that wants to steal it.
- Test your oil temperature – Around 350°F is the sweet spot because too hot means burnt outside with raw inside, too cool means soggy coating and butter that has plenty of time to leak out while you’re waiting for things to brown.
- Have a backup plan for butter leakage – Because listen, even with perfect technique, sometimes that butter finds a way out, and when it does, just embrace it and make sure you’ve got something on your plate ready to soak up the herby goodness.
- Let them rest for a minute after frying – I know you want to cut into them immediately, but giving them just 60 seconds to settle means the difference between butter that stays mostly inside versus butter that’s now decorating your cutting board.
Nutritional Facts
This indulgent dish packs a caloric punch, but hey, sometimes you need that crispy, buttery comfort food hit.
- Calories: Approximately 650-700 per serving (depending on oil absorption)
- Total Fat: 45-50g (primarily from butter and frying oil)
- Saturated Fat: 12-15g (mostly from the herb butter filling)
- Cholesterol: 140-160mg (from chicken breast and egg coating)
- Sodium: 200-250mg (can vary based on breadcrumb type)
- Carbohydrates: 12-15g (flour and breadcrumb coating)
- Fiber: 1g (minimal from breadcrumbs)
- Protein: 50-55g (primarily from the chicken breast)
- Sugar: Less than 1g
- Vitamin A: 15% daily value (from butter and parsley)
- Iron: 8-10% daily value (from chicken and flour)
- Calcium: 4-6% daily value (from egg and breadcrumbs)
Fun “Did You Know?”
Beyond those impressive nutritional numbers, Chicken Kiev carries some fascinating culinary secrets that’ll make you appreciate this dish even more.
Originally created in Ukraine, this dish gained popularity when Russian chefs brought it to fine dining establishments worldwide. The name “Kiev” actually refers to Ukraine’s capital city.
Here’s what’s truly amazing: when you cut into properly made Chicken Kiev, the herbed butter inside should burst out like a golden fountain. That’s why restaurants often warn diners to be careful with their first cut.
The dish became so iconic that it’s considered the ultimate test of a chef’s technical skill.