Why You’ll Love This these Crispy Homemade Gluten-Free Chickpea Crackers
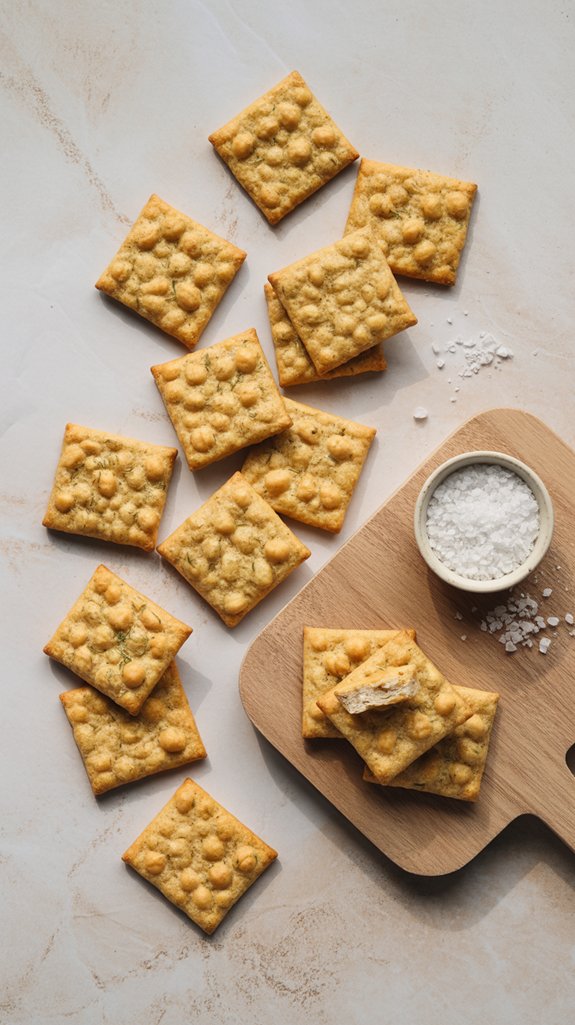
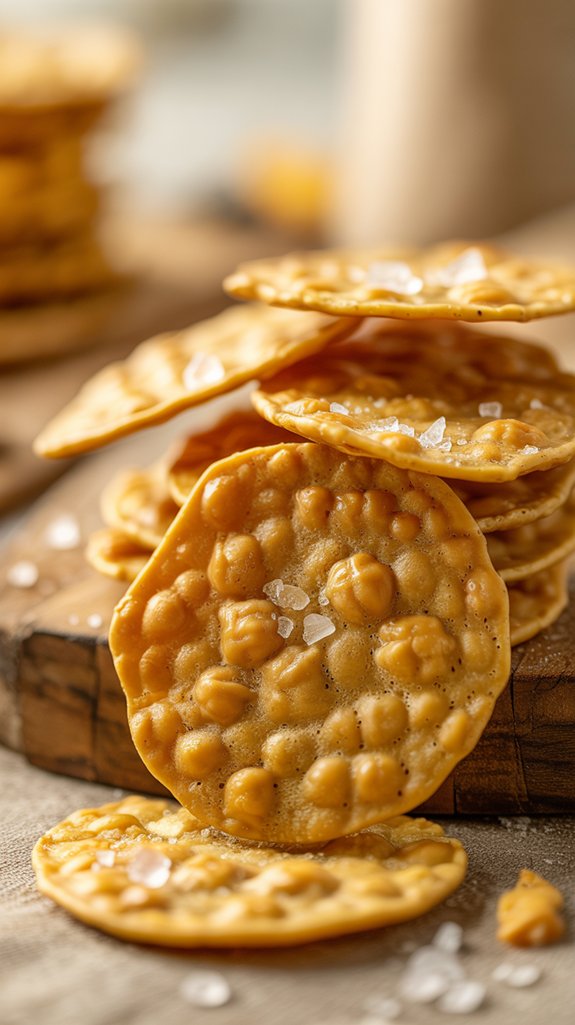
These golden, crispy crackers pack all the satisfying crunch you crave, made with protein-rich chickpea flour that actually makes you feel good about your snacking choices.
The dough rolls out paper-thin between plastic wrap – no fancy equipment needed – and bakes up into dozens of restaurant-quality crackers that cost a fraction of store-bought versions.
They’re naturally gluten-free and sturdy enough for your thickest hummus or cheese spread, which means no more sad, broken crackers floating in your dip.
Ingredients List
This simple ingredient list proves that sometimes the best recipes are hiding in your pantry right now, waiting to transform into something magical.
- 1 1/2 cups chickpea flour
- 1/2 cup rice flour
- 1/4 teaspoon salt
- 1 teaspoon gluten free baking powder
- 1/2 teaspoon turmeric
- 1/3 cup flax seed meal
- 1 tablespoon canola oil
- 3/4 cup water
The beauty of these ingredients goes way beyond their simplicity – they’re actually doing your body some serious favors:
- Chickpea flour brings protein and fiber to the party, keeping you satisfied longer than regular crackers
- Flax seed meal adds omega-3 fatty acids and even more fiber, because who doesn’t need that
- Turmeric sneaks in anti-inflammatory benefits while giving these crackers their gorgeous golden color
- Rice flour keeps everything light and crispy without any gluten drama
- The minimal oil content means you can munch without the guilt that usually comes with store-bought crackers
Step by Step Directions
Making these crispy, golden chickpea crackers is surprisingly straightforward and requires just basic kitchen equipment.
- Preheat your oven to 350°F (180°C)
- Mix all dry ingredients (chickpea flour, rice flour, salt, baking powder, turmeric, and flax seed meal) together in a large bowl until well combined.
- Stir in the canola oil, then gradually add water a little at a time while mixing.
- Form the mixture into a dough ball, adding more water if too dry or more flour if too sticky.
- Divide the dough in half and roll each portion into a ball.
- Dust a Silpat mat or large piece of plastic wrap with gluten-free flour.
- Flatten one dough ball into a rectangle and place it on the prepared surface.
- Sprinkle more flour on top, cover with another piece of plastic wrap, and roll out as thinly as possible using a rolling pin.
- Remove the top plastic wrap layer and re-dust with flour as needed during rolling.
- Once rolled thin (less than 1/8 inch), remove the top plastic layer and dust lightly with flour.
- Place a baking sheet over the dough, slide another sheet under the bottom plastic, flip everything over, and remove the remaining plastic wrap.
- Optional: brush the surface with egg white or cornstarch glaze before baking.
- Bake for 12-15 minutes until lightly browned and crispy.
- Cool completely before storing in an airtight container (crackers will continue to crisp as they cool).
- Repeat the rolling and baking process with the second dough ball.
For even better results, consider using a professional dutch oven to maintain consistent temperature throughout the baking process.
Substitutions and Variations
- Sweet version: Want to go completely off-script? Skip the turmeric and salt, add a tablespoon of honey or maple syrup, and sprinkle with cinnamon for a sweet treat that’ll confuse everyone in the best way.
- Thickness matters: Rolling them thinner makes them crispier, while slightly thicker crackers will have more chew – both have their place depending on what you’re planning to pile on top of them.
Additional Things to Serve With This Dish
These nutty, earthy crackers are basically begging to be topped with something delicious, and honestly, they pair with just about everything you can think of.
- Classic hummus and veggies – It’s chickpea on chickpea action, which might sound redundant but trust me, it works like a dream with cucumber slices or cherry tomatoes.
- Cheese and charcuterie – The mild flavor plays nice with sharp cheddars, creamy brie, or that fancy goat cheese you’ve been saving for a special occasion.
- Avocado toast atmosphere – Mash up some avocado with lime and sea salt, or go full millennial with everything bagel seasoning sprinkled on top.
- Sweet spreads – Almond butter, cashew cream, or even a drizzle of honey work surprisingly well, especially if you made the sweet cinnamon version.
- Soup dipper – These hold up beautifully in tomato soup, butternut squash bisque, or any creamy soup that needs a little textural contrast.
- Tuna or chicken salad – The sturdy texture means they won’t crumble under the weight of your favorite protein salad, unlike those delicate store-bought crackers that always seem to break at the worst possible moment.
Cooking Tips & Tricks (Chef’s Notes)
Making these crackers is pretty straightforward, but a few little tricks will save you from the frustration of cracked dough and uneven baking.
- Roll thin, roll patient – The thinner you get these, the crispier they’ll be, but don’t rush it or you’ll end up with holes everywhere. Take your time between those plastic wrap layers, peeling and re-dusting as needed.
- Water temperature matters – Room temperature water mixes more evenly than cold, and you’ll get a smoother dough that’s easier to work with.
- The flip trick is essential – That whole plastic wrap sandwich method might seem fussy, but it’s the only way to get paper-thin crackers onto your baking sheet without them falling apart in your hands.
- Watch the edges – They brown faster than the center, so if you see them getting too dark while the middle is still pale, cover just the edges with foil strips.
- Don’t skip the cooling – These seem soft when they first come out, which always makes me panic that I’ve underbaked them, but they crisp up beautifully as they cool down.
- Storage is everything – Any leftover moisture will make them soggy, so wait until they’re completely cool before sealing them up, and toss in a small piece of paper towel to absorb any humidity.
- Batch rolling saves time – Roll out both dough balls before you start baking, so you can pop the second sheet in as soon as the first one comes out.
Nutritional Facts
These protein-packed chickpea crackers deliver impressive nutrition in every crunchy bite, making them a smart alternative to traditional wheat-based snacks.
- High in plant-based protein – Chickpea flour provides about 6 grams of protein per serving, helping keep you satisfied longer than regular crackers.
- Rich in fiber – Between the chickpea flour and flax seed meal, you’re getting around 4 grams of fiber per serving to support digestive health.
- Good source of folate – Chickpeas are naturally high in this B-vitamin that’s essential for cell division and DNA synthesis.
- Contains healthy omega-3s – The flax seed meal adds beneficial omega-3 fatty acids that support heart and brain health.
- Iron boost – One serving provides about 10% of your daily iron needs, important for oxygen transport in the blood.
- Low glycemic impact – The combination of protein and fiber helps slow blood sugar spikes compared to refined grain crackers.
- Magnesium content – Chickpeas provide magnesium for muscle and nerve function, plus bone health.
- Naturally cholesterol-free – Plant-based ingredients mean zero cholesterol and minimal saturated fat.
- Gluten-free carbohydrates – About 15 grams of complex carbs per serving provide steady energy without gluten.
- Antioxidant properties – Turmeric adds anti-inflammatory compounds, while chickpeas contain various protective antioxidants.
Fun “Did You Know?”
While chickpeas might seem like a modern health food trend, they’ve actually been cultivating human civilization for over 10,000 years, making them one of the oldest legumes known to humanity.
I find it fascinating that ancient Romans considered chickpeas so valuable they named themselves after them – Cicero literally means “chickpea.”
These protein-packed legumes can grow in harsh conditions where other crops fail, which explains why they’ve sustained civilizations across Mediterranean and Middle Eastern regions.
When you’re munching on these homemade crackers, you’re literally eating a piece of agricultural history that’s nourished countless generations before us.