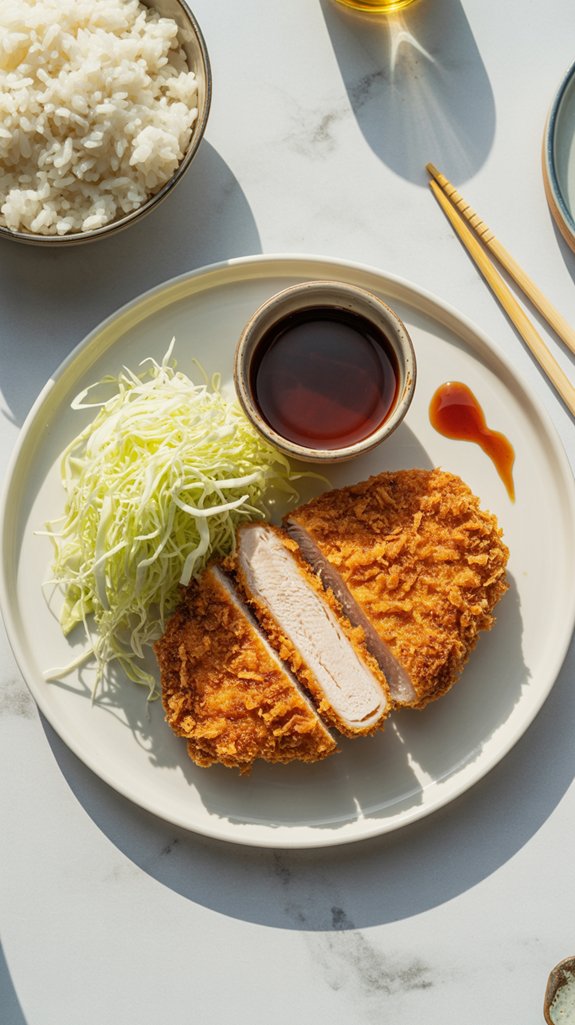

Why You’ll Love This this Next-Level Japanese Chicken Katsu
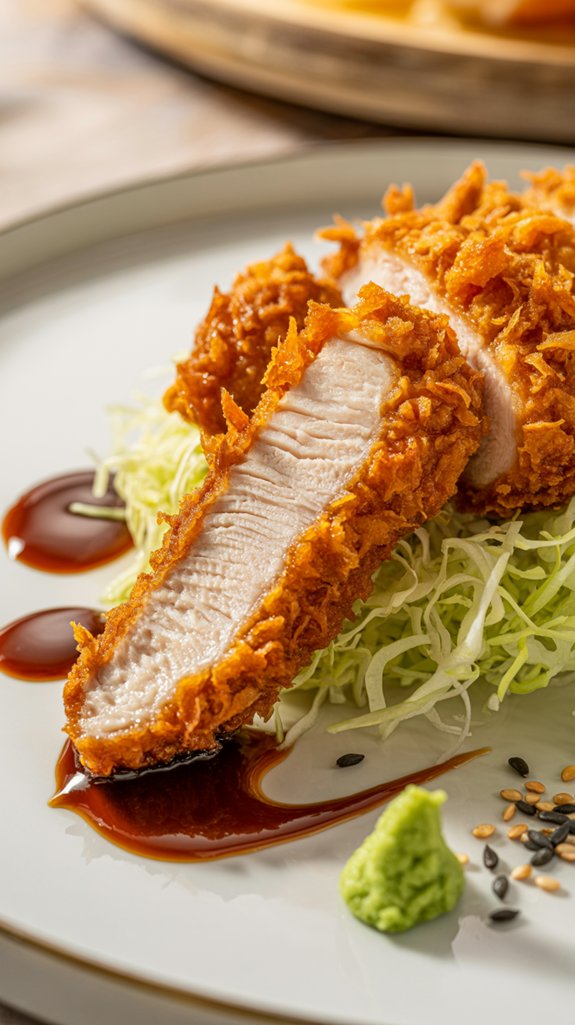
This crispy, golden chicken katsu delivers that perfect crunch we all crave, with tender, juicy chicken thighs that practically melt in your mouth once you bite through that gorgeous panko coating.
The homemade katsu sauce brings together tangy Worcestershire, ketchup, and just a hint of heat that makes every single bite absolutely irresistible.
Trust me, once you master this foolproof breading technique, you’ll be turning out restaurant-quality katsu that’ll have everyone wondering how you became such a kitchen wizard.
Ingredients List
Gathering these ingredients is honestly the easiest part of making chicken katsu, and you probably have most of them hanging out in your kitchen right now.
For the Chicken:
- 2 lbs chicken thighs, boneless skinless
- 1/2 teaspoon salt, to taste
- 1/2 teaspoon white pepper, to taste
- 1/2 teaspoon garlic powder
- 1 egg
- 1/2 cup milk
- 1/2 lb panko breadcrumbs
- 1 quart canola oil
For the Katsu Sauce:
- 1/4 cup ketchup
- 1/2 cup Worcestershire sauce
- 2 tablespoons soy sauce
- 2 dashes Tabasco sauce
- 1/4 teaspoon pepper, to taste
A Few Things Worth Mentioning About These Ingredients:
- Chicken thighs are your secret weapon here – they’re naturally more tender and forgiving than breasts, plus they pack way more flavor.
- Panko breadcrumbs create that signature light, airy crunch that regular breadcrumbs just can’t match.
- Canola oil handles high heat like a champ and won’t compete with the chicken’s flavor.
- The sauce ingredients might seem like a random combo, but trust the process – that tangy-sweet-umami thing really works.
- White pepper keeps the coating looking clean and golden, though black pepper works fine if that’s what you’ve got.
Step by Step Directions
Making chicken katsu is all about getting that perfect crispy coating and tender, juicy meat inside.
Prep the Chicken:
- Trim fat from chicken thighs and filet to uniform ½-inch thick pieces
- Season chicken with salt, white pepper, and garlic powder
- Set up three stations: flour in one 9×13 pan, egg wash (beaten egg and milk) in another 9×13 pan, and panko breadcrumbs in a third pan
- Prepare a clean sheet tray for the breaded chicken
Bread the Chicken:
- Lightly dust each piece of chicken in flour
- Dip floured chicken into egg wash, letting excess drip off
- Press chicken into panko breadcrumbs, covering completely and pressing firmly so coating adheres
- Place breaded pieces on clean sheet tray, using wax paper between layers
Fry the Chicken:
- Heat canola oil in heavy 10-inch pot to 325°F
- For even better heat distribution and temperature control, consider using an enameled cast iron Dutch oven instead of a regular pot.
- Fry chicken in batches until golden brown, about 5 minutes per batch
- Test first piece for doneness before continuing
- Drain on paper towels or wire rack
- Let chicken rest, then slice into strips
Make the Katsu Sauce:
- Combine ketchup, Worcestershire sauce, soy sauce, Tabasco, and pepper
- Mix well and serve alongside sliced chicken katsu
Substitutions and Variations
Chicken Cuts:
- Chicken breasts work perfectly if you prefer white meat, though they can dry out faster than thighs – just watch your cooking time like a hawk.
- Pork cutlets make an excellent swap for tonkatsu instead, using the exact same method.
- Turkey cutlets are another solid option, especially if you’re feeding someone who doesn’t eat chicken.
Coating Options:
- Regular breadcrumbs will work in a pinch, but honestly, panko gives you that signature crunch that makes katsu special.
- Crushed cornflakes create an unexpectedly delicious coating – sounds weird, tastes amazing.
- For gluten-free folks, almond flour mixed with crushed pork rinds creates a crispy coating that’ll fool anyone.
Oil Alternatives:
- Vegetable oil or peanut oil work just as well as canola for frying.
- If you’re avoiding deep frying, you can bake these at 400°F for about 20 minutes, flipping halfway through – though you’ll miss some of that golden crispiness.
Sauce Variations:
- Store-bought katsu sauce saves time when you’re in a rush.
- Sweet chili sauce gives it a Thai twist that’s surprisingly good.
- Even ranch dressing works if you’re feeding picky eaters, though purists might cringe.
Seasoning Tweaks:
- Add a pinch of ginger powder to the flour mixture for extra warmth.
- Paprika in the breading gives a subtle smoky flavor and prettier color.
- A dash of onion powder never hurt anyone’s chicken coating.
Additional Things to Serve With This Dish
Chicken katsu deserves side dishes that complement its crispy, savory goodness without competing for attention.
Classic Japanese Pairings:
- Steamed white rice is the obvious choice – it soaks up that katsu sauce like a dream and balances the richness.
- Miso soup on the side adds warmth and umami depth to round out the meal.
- Pickled vegetables (tsukemono) cut through the fried coating with bright, tangy bites.
- Simple cabbage slaw dressed with rice vinegar provides fresh crunch and helps cleanse the palate.
- Edamame makes a perfect starter while you’re waiting for the oil to heat up.
Western-Style Accompaniments:
- Roasted vegetables like broccoli or asparagus add color and nutrition to your plate.
- A simple green salad with sesame dressing keeps things light alongside the fried chicken.
- Garlic mashed potatoes mightn’t be traditional, but they’re undeniably delicious with katsu sauce.
- Steamed broccoli with a squeeze of lemon provides a fresh contrast to all that golden crispiness.
Sauce Station Setup:
- Multiple small bowls of different sauces let everyone customize their encounter.
- Extra katsu sauce is never a mistake – some people like to drown their rice in it.
- Spicy mayo appeals to those who want a creamy kick with their chicken.
- Ponzu sauce provides a citrusy alternative that’s lighter than the traditional katsu sauce.
The key is keeping sides simple so your perfectly crispy chicken remains the star of the show.
Cooking Tips & Tricks (Chef’s Notes)
Getting this chicken katsu just right takes a few insider moves that’ll save you from the heartbreak of soggy coating or dry meat.
The Breading Station Setup:
- Keep one hand for dry ingredients and one for wet – trust me on this flour-fingers situation.
- Press that panko like you mean it, really getting it to stick by gently pounding the chicken.
- Let the breaded pieces rest for 10 minutes before frying so the coating sets up properly.
- Double-dip if your coating looks thin – more panko never hurt anyone’s feelings.
- Getting that flawless, even breading starts with proper butterfly cutting – our Japanese cooking techniques article shows you exactly how to nail this essential skill.
Oil Temperature Magic:
- A candy thermometer is your best friend here, but dropping a pinch of panko works too – it should sizzle immediately.
- Don’t overcrowd the pot or your oil temperature will drop faster than your enthusiasm.
- Keep the oil between 325-350°F – any hotter and you’ll get burnt outsides with raw centers.
- Test your first piece by cutting into it, because nobody wants to serve chicken sashimi.
The Perfect Pound:
- Pound those thighs to even thickness using a meat mallet or rolling pin wrapped in plastic.
- Aim for that half-inch sweet spot – thick enough to stay juicy, thin enough to cook through.
- Score the surface lightly with a knife to help the coating grip better.
- Salt the chicken 30 minutes before breading if you have time – it makes all the difference in flavor.
Frying Finesse:
- Don’t flip too early – wait until the edges look golden and set.
- Use tongs instead of a fork to avoid puncturing and losing those precious juices.
- Drain on a wire rack over paper towels, not just paper towels alone – nobody likes a soggy bottom.
Nutritional Facts
This crispy Japanese favorite packs a satisfying punch of protein while keeping things relatively reasonable on the calorie front.
Per Serving (serves 4-6):
- Calories: 520-680 per serving (depending on portion size)
- Protein: 35-42g – excellent source from the chicken thighs
- Fat: 28-35g – primarily from frying oil and natural chicken fat
- Carbohydrates: 32-40g – mostly from panko breadcrumbs
- Fiber: 2-3g from the panko coating
- Sodium: 850-1,100mg – watch this if you’re sodium-sensitive
- Cholesterol: 145-180mg from chicken and egg wash
- Iron: 8-12% daily value from the chicken
- Vitamin B6: 25-30% daily value – great for metabolism
- Niacin: 40-50% daily value – supports nervous system health
- Phosphorus: 20-25% daily value for bone health
- Selenium: 35-40% daily value – powerful antioxidant properties
Health Notes:
- Dark meat chicken provides more iron and zinc than white meat
- Panko breadcrumbs are lighter and absorb less oil than regular breadcrumbs
- Deep frying adds significant calories – consider air frying for a lighter version
- The katsu sauce adds minimal calories but watch the sodium content
Fun “Did You Know?”
I find it fascinating that “katsu” comes from the English word “cutlet.”
The dish became so popular that it spawned countless variations – pork tonkatsu, fish katsu, and even vegetable versions.
Here’s something cool: many Japanese students eat katsu before exams because “katsu” sounds like “katsu,” meaning “to win” or “to be victorious.”
It’s considered lucky food!